Programs like Automatic Updates, Windows Update, Remote Desktop Connection, Windows Explorer for network file copy, etc, use WinHTTP or Windows HTTP Services.
Window Auto-Tuning feature in Windows 11/10
Window Auto-Tuning feature is enabled by default in Windows 11/10 and makes data transfers over networks more efficient. But if your network uses an old router or your firewall software does not support this feature, then you may experience slow data transfers or even loss of connectivity. Says Microsoft,
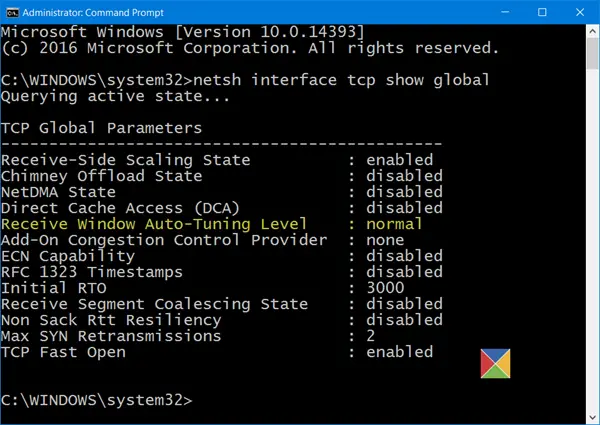
To check the status of Auto-Tuning feature on your system, in an elevated command prompt window, type the following and hit Enter: If you see ‘normal’ written against Receive Window Auto-Tuning Level, it means that the feature is enabled and it is working fine. To disable Windows AutoTuning, run the following command: To enable Windows AutoTuning, run the following command:
Let the default settings of Window Auto-Tuning feature be enabled
Let the default settings of Window Auto-Tuning feature be enabled. If your network uses an old router or your firewall software does not support this feature, and you are experiencing poor or no connectivity issues, only then may you disable this feature and see if it works in your favor. BONUS TIP: To enable the Receive Window Auto-Tuning feature for HTTP traffic, you can run regedit and navigate to the following registry subkey, says KB947239: Right-click on it > New > DWORD Value. Type TcpAutotuning and give it a vale of 1.
Click OK and exit. To disable Receive Window Auto-Tuning feature for HTTP traffic, give it a value of 0 or delete the created TcpAutotuning DWORD. TIP: You can Analyze and Optimize TCP/IP with TCP Optimizer Hope this solves the confusion about whether to enable or disable the Window Auto-Tuning feature. See this post if you are facing Network & Internet connection problems.